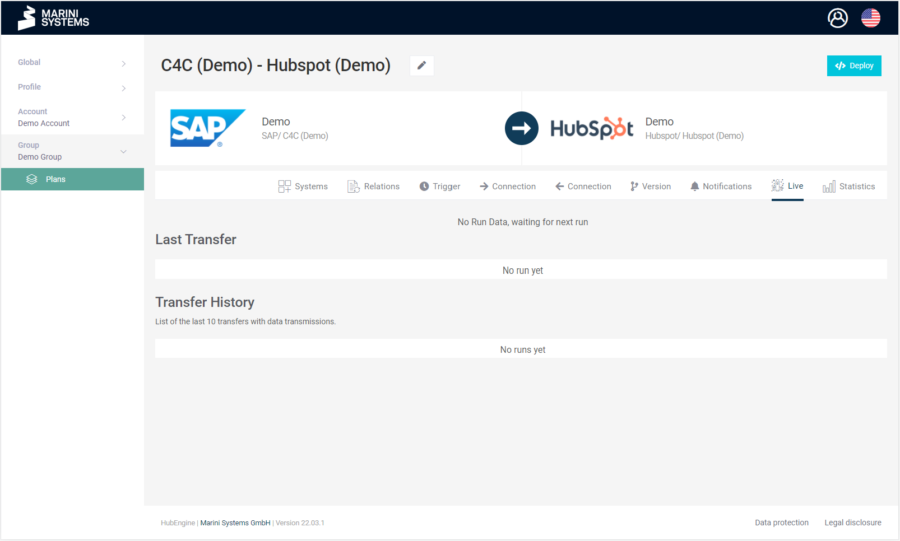
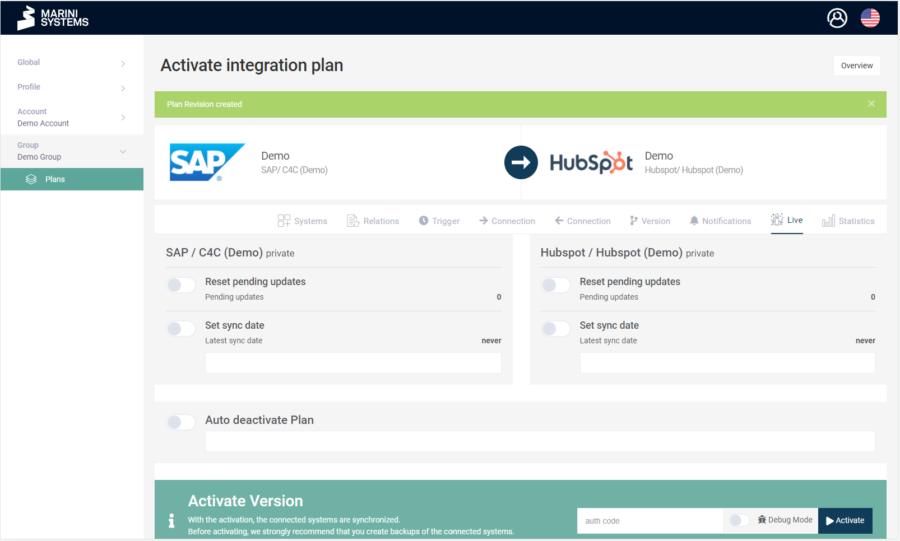
To activate plans in the HubEngine, you need the appropriate rights. If you do not have these rights, no corresponding button will appear in the upper right corner. Three cases can occur if you have sufficient rights:
- Deploy Button
- Deploy & Activate Button
- Activate Button
Deploy refers to the process when a plan has been modified and the changes to the plan are to be versioned. Activate, on the other hand, refers to the process of putting a plan into operation. If you only deploy, then the plan is not active yet, so no data is synchronized.
1. Deploy Button
This case occurs when you first set up your plan. At the end, you have the option to deploy and activate your plan.
2. Deploy & Activate Button
When you modify a plan, you can save (deploy) the changes without activating the plan. If you make changes and activate the plan directly, it will be deployed automatically within the activation process.
3. Activate Button
This is the case if you have deployed changes but have not yet activated the plan. Then only the Activate function is available to you.
Requirement: 2-factor authentication
Two-factor authentication is required to activate a HubEngine plan. This is implemented using Google Authenticator. To initially activate the Google Authenticator for your HubEngine account, follow the steps below:
- Log in to HubEngine at HubEngine-Login.
- In the left-hand side navigation, go to Settings.
- In the Security section, click on Setup under Google Authenticator.
- A link will open with step-by-step instructions on how to set up the authenticator.
- Complete the setup
Options when activating a plan
You have several additional options concerning the activation of a plan:
- Reset Pensing Updates
- Set Sync Date
- Activate Test Mode
- Activate Debug Mode
- Automatic Plan Deactivation
1. Reset Pending Updates
If you select this option, then any updates that are pending will be disregarded and reset. This can happen if you deactivate or edit your plan while a plan execution is in progress. You will be notified if the synchronization of records is pending.
2. Set Sync Date
By setting the synchronization date, you define from when changes should be synchronized. You define the change date of the first plan execution after activation that is considered. This way you can also fetch historical data. If you want to know exactly how a synchronization works and why the change date plays a crucial role, you can read about it here.
How does a synchronization work in the HubEngine?
3. Activate Test Mode
The test mode can be activated as long as the plan has not yet been activated productively. As soon as the plan has been activated productively, the activation of the test mode is no longer possible.
The test mode enables the activation of the plan without incurring additional costs for the plan. In this way, plans can be created and tested under real conditions.
4. Activate Debug Mode
If you activate the debug mode, you will have extended logs. These are activated for 24 hours. After that the debug mode is deactivated automatically.
5. Automatic Plan Deactivation
Here you can select a time when the plan will be deactivated automatically.

